Introduction
- Theme Version: 2.1.0
- Created: 24 May 2017
- Latest update: 31 Aug 2023
Thank you for purchasing our theme. In this document, we provide all kinds of good information with all the details you need to use our theme. We hope you have fun and enjoy working with our theme. If you need more help, please feel free to open a ticket on our support center.
Before Getting Started
If you are not familiar with WordPress, please get accustomed with it before proceeding to using our theme. Here are some links that will help you to become more confident with WordPress:
- First Steps with WordPress: https://wordpress.org/support/article/first-steps-with-wordpress-classic/
- WordPress Optimization: https://wordpress.org/support/article/optimization/
- We recommend that you should use CDN if you sell products on many countries
- If you don't yet have a hosting, you should find the popular hosting providers, such as A2 Hosting, Bluehost, ...
Requirements & Compatibility
Requirements
To run WordPress your host just needs a couple of things:
- PHP version 7.4 or greater
- MySQL version 5.6 or greater
Compatibility
Our theme is compatible with these browsers:
- Chrome
- Firefox
- Safari
- Microsoft Edge
Installation
WordPress Core
You download and install WordPress version 5.0 or later
Theme Package
To download, you need to log into your ThemeForest account and go to your http://themeforest.net/downloads page. Locate the theme that you purchased in your Downloads list and click on the Download button
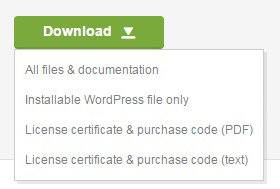
- All files & documentation: contains documentation, licenses, theme package, child theme package and some PSD files. So if you select this option, you need to extract the downloaded package and install the theme package inside.
- Installation WordPress file only: contains only the theme package
- License certificate & purchase code (PDF): contains your license information in a PDF file
- License certificate & purchase code (text): contains your license information in a text file
WordPress Installation
Follow the steps below to install via WordPress:
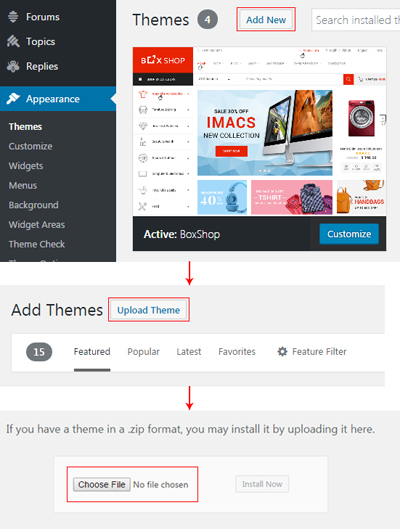
- In your WordPress Admin Panel, go to Appearance > Themes
- Click on the Add New and Upload Theme buttons
- Click on the Choose File button and navigate to find the boxshop.zip file on your computer and click on the Install Now button
- Wait while the theme is uploaded and installed
- Activate the newly installed theme
- Then you will get a notification about installing the required plugins. Follow the steps to install and activate the plugins
- Some hostings have a restriction on a size of a file that you are uploading. If you have any warning, you will contact your hosting provider. They should increase your maximum upload size. Or you can refer this article and do it by yourself.
- You only upload the installable wordpress file. If not, you may get an error message: The package could not be installed. The theme is missing the style.css stylesheet.
FTP Installation
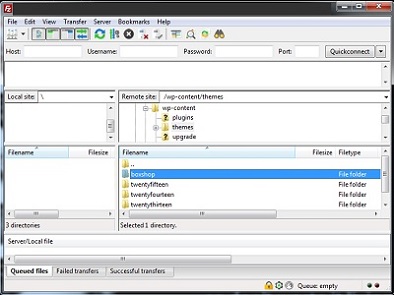
Follow the steps below to install via FTP:
- Log into your hosting space via a FTP software
- Unzip the boxshop.zip file and ONLY use the extracted boxshop folder
- Upload the extracted boxshop folder into wp-content > themes folder
- Go to Appearance > Themes and activate BoxShop theme
- Then you will get a notification about installing the required plugins. Follow the steps to install and activate the plugins
Required Plugins
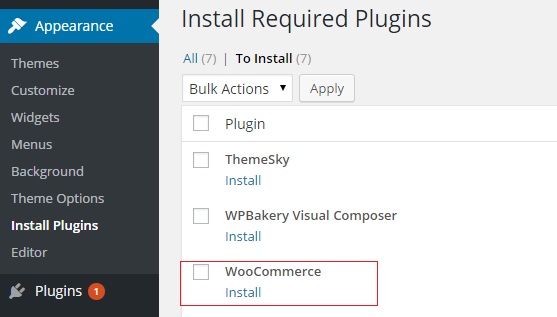
After activating the theme, you will get a notification about installing the required plugins. You go to Appearance > Install Plugins to install them.
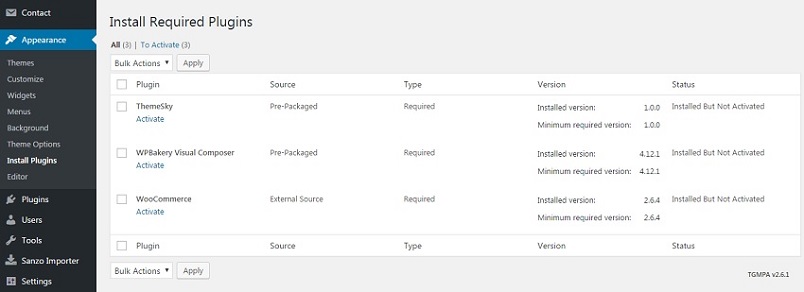
- You don't directly purchase the WPBakery Page Builder and Revolution Slider plugins. So you can not update them by yourself. It is also not recommended. When they have a new version, we will be careful to test and release the new theme's version.
- You should also not update other plugins without updating the theme. Please see our changelog to make sure the current theme's version is compatible with the new plugin's version.
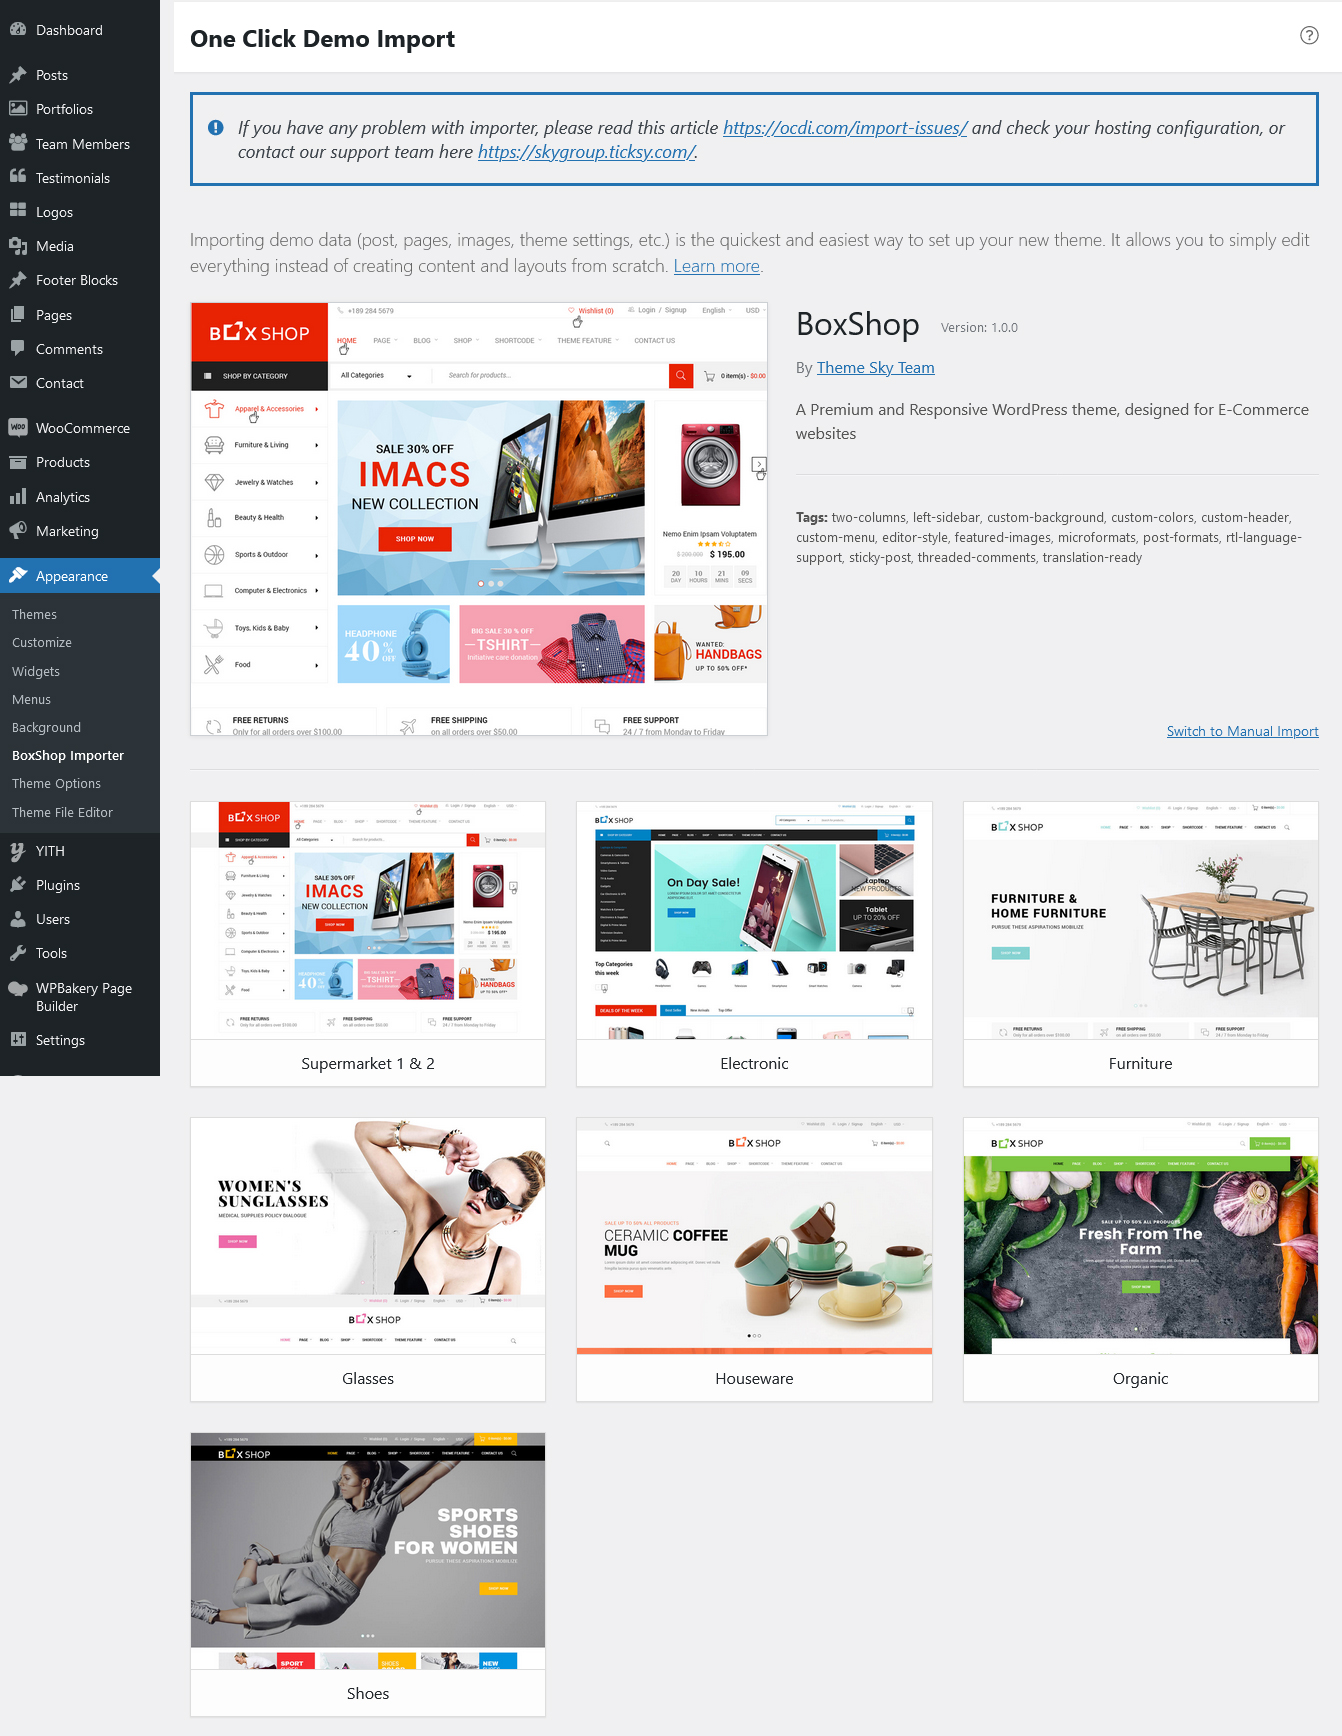
Demo Content
Our theme includes the demo data to the One Click Demo Import plugin. In admin panel, you go to Appearance > BoxShop Importer (You have to install and activate the ThemeSky plugin to see this menu item). Then you select demo which you want to import, click on the Import Demo button and the Continue & Import button without selecting any recommended plugin from One Click Demo Import. It will take a few minutes to complete.
Updating The Theme
Manual Update
Follow the steps below to manually update the theme:
- First, you download the new theme package from themeforest. You have to log into your themeforest account and navigate to the Downloads tab. You find the BoxShop theme in your purchased themes list.
- You delete the current theme. Don't worry about this. Your data won't be lost.
- You upload the new theme package via WordPress or FTP software.
Automatic Update
You update the theme through the Envato Market plugin. Follow the steps below to set up this plugin:
- Download and install the Envato Market plugin
- You go to here https://build.envato.com/create-token/ and create a token. Get it.
- In WordPress admin panel, you find the section called Envato Market. You enter your token code in there.
Please read this tutorial https://skygroup.ticksy.com/article/15704 to get more information.
- If you translated the theme to another language, you should backup your translation files in the themes > boxshop > languages folder before updating. You should also backup the translation files in the plugin folder.
- After updating the theme, you should update the recommended plugins if there is a notification message about updating plugins. You go to Appearance > Install Plugins to update plugins. If you can not update the recommended plugins in wp admin, you should manually update them. You can find the plugin packages in the theme folder > framework > plugins folder.
- You can not update the WPBakery Page Builder and Revolution Slider plugins in Appearance > Install Plugins. To update these 2 plugins, you need to delete them first. Then, you go to Appearance > Install Plugins and install them again.
Theme Options
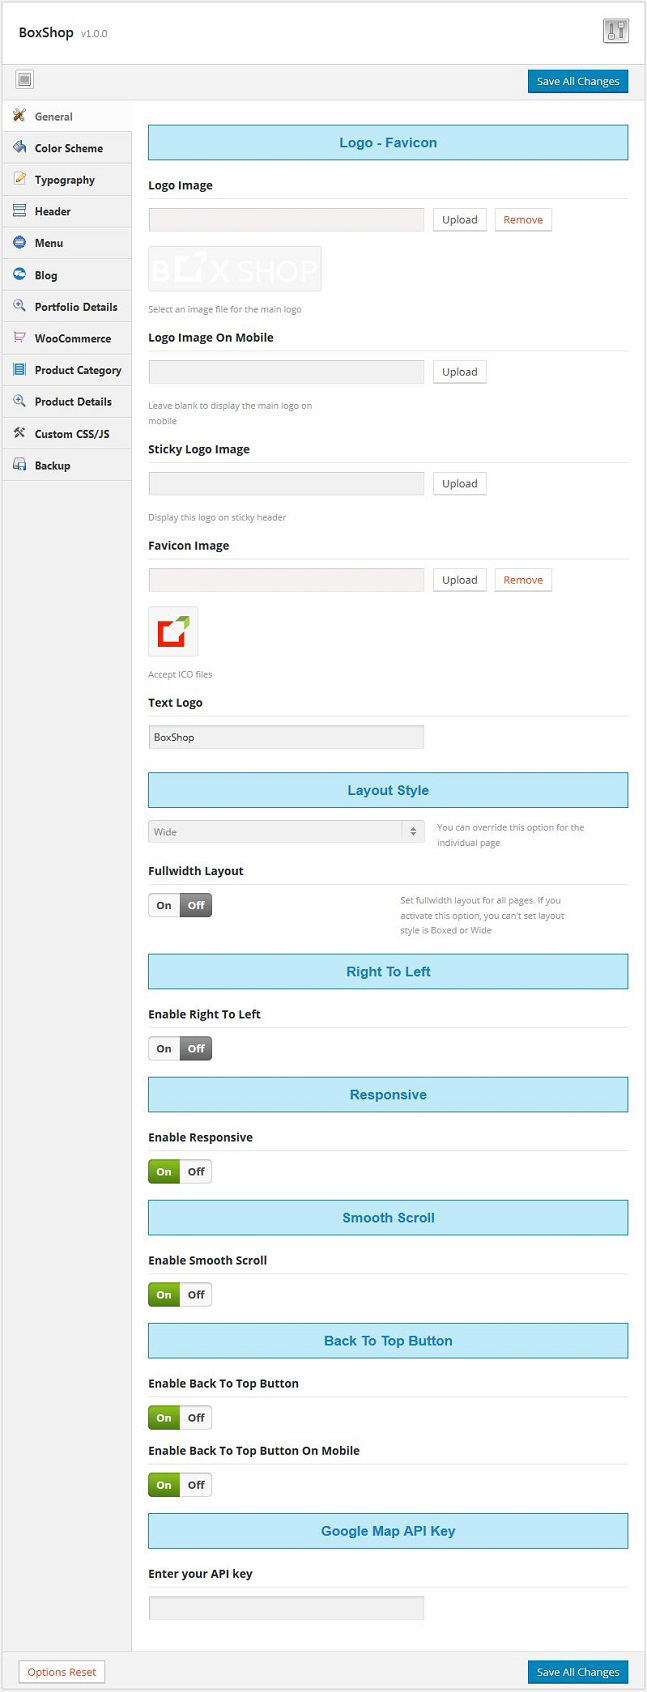
After activating our theme, you can go to Appearance > Theme Options to configure the theme. Below will explain what you can do with Theme Options.
- General: Add your logo and some global options
- Color Scheme: manage your site color. You can select the preset colors which we provide
- Typography: you can change font and font size in there
- Header: set up the Header Layout, breadcrumb and other options for header
- Menu: some options for menu
- Blog: configure the Blog Layout and some options to Show/Hide some things on the blog page
- Portfolio Details: some options to Show/Hide some things on the portfolio page
- WooCommerce: some global WooCommerce options, such as Product label, Quickshop, Ajax search
- Product Category: you configure your Shop page in there
- Product Details: you configure your Product page in there
- Custom CSS/JS: allow you to add custom css/js
- Backup: backup or restore your theme options
Adding A New Sidebar
- In the Widgets editor, you scroll down to the bottom
- On the right hand side, you will see a form
- You input your sidebar name and click on the Add Sidebar button

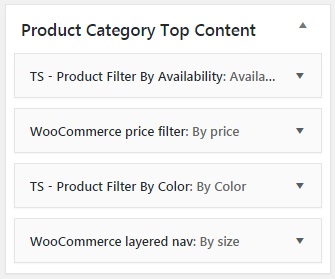
Product Category Top Content
This widget area allows you to add the filter widgets into the Shop/Category page as the screenshot.

You go to Appearance > Widgets. You drag and drop the filter widgets into the Product Category Top Content widget area.
Header
The header is probably one of the first thing that you will want to setup. It includes the logo, favicon, menu and other things. The following sections will explain how to set up and customize header.
Adding The Logo & Favicon
Follow the steps below to set up the logo & favicon:
- Navigate to Appearance > Theme Options. You select the General tab
- Click on the Upload button and choose a file from your library
- You can also add the image link into the input field
Setting Up Header
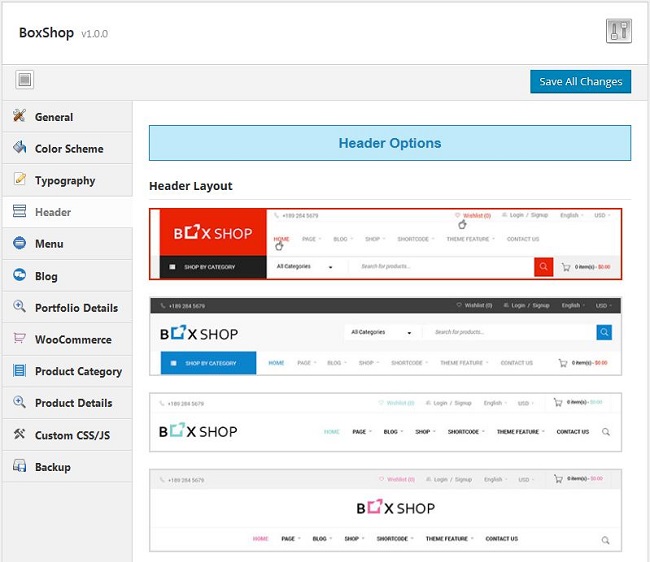
To set up your header, you go to Appearance > Theme Options > Header tab. In there, you can choose the Header Layout, configure your breadcrumb and other options.
Header Layout
BoxShop comes with 7 different header layouts. Just choose one of our header layouts for your site.
You can also choose the header layout for individual pages (see Page Options).
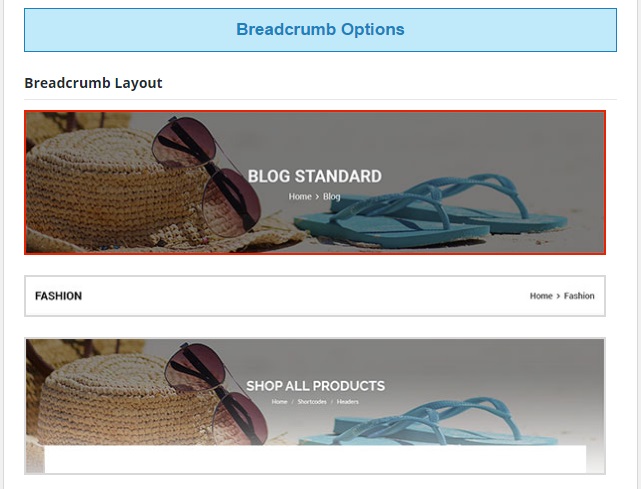
Breadcrumb
BoxShop comes with 3 different breadcrumb layouts. Just choose one of our breadcrumb layouts for your site.
You can also choose the breadcrumb layout for individual pages (see Page Options).
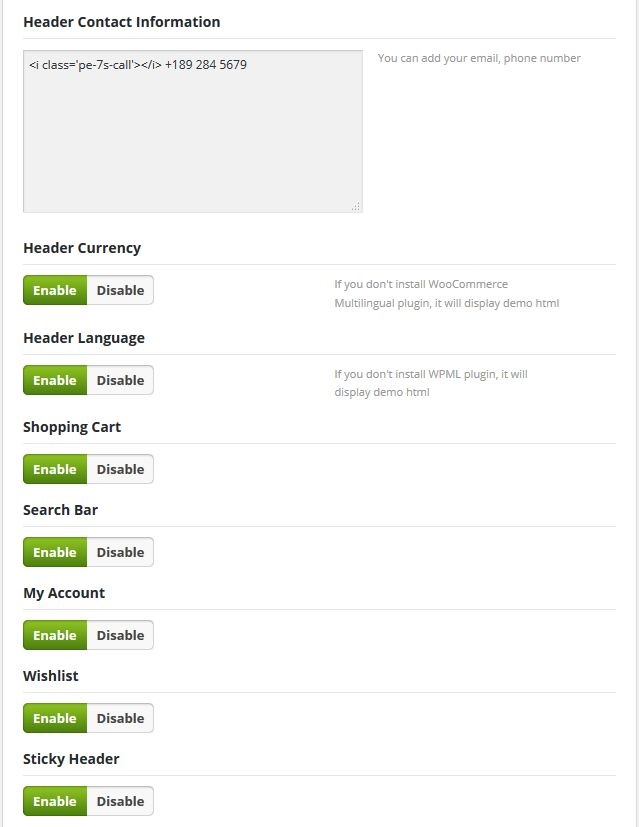
Other Options
- Header Contact Information: Add your contact information in the top header
- Header Currency: Show/Hide multi-currency switcher
- Header Language: Show/Hide multi-language switcher
- Shopping Cart: Show/Hide mini cart
- Search Bar: Show/Hide the search bar
- My Account: Show/Hide the login form/my account link
- Wishlist: Show/Hide the wishlist page link
- Sticky Header: Show/Hide the header when you scroll down
Header Customization
If you want to customize the theme, you should create the child theme before making any changes.
You can find the sample child theme package (the boxshop-child.zip file) in your downloaded file (you have to download All files & documentation).
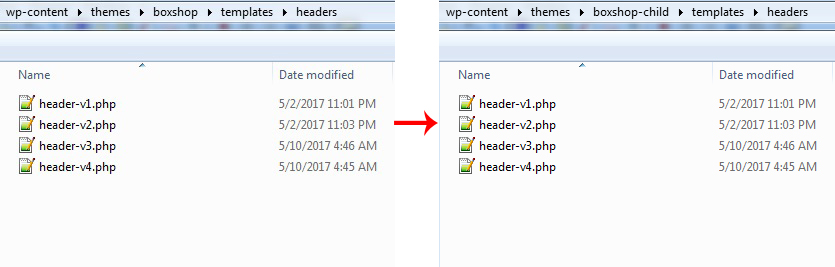
Follow the steps below to override header template:
- Create the templates > headers folders in the child theme folder
- Copy the template file from the parent theme folder to the child theme folder
- Edit the template file in the child theme folder
Footer
BoxShop allows you to create unlimited footer layouts. The following sections will explain how to set up a new footer.
Adding Footer Content
Follow the steps below to add a new footer content:
- In admin panel, you go to Footer Blocks
- Add a new footer block and add content as you normally do with the pages
- Then, you go to Appearance > Widgets. You drag and drop the TS - Footer Block widget into Footer Widget Area or Footer Copyright Widget Area
- Simply choose your footer block from dropdown list

- You have to activate our ThemeSky plugin to see the Footer Blocks menu item and the TS - Footer Block widget.
- If the WPBakery Page Builder editor does not show up, you will go to WPBakery Page Builder > Role Manager. You set Post types to Custom and check the ts_footer_block post type below.
Adding a Widget to Footer Content
Sometimes, you need to add a widget to Footer Content. You can not find the widget in WPBakery Page Builder content element list. Please follow the steps below:
- Add a new sidebar. To do it, you go to Appearance > Widgets. You will see a form at the bottom. You input your sidebar name and click on the Add Sidebar button
- Drag and drop a widget into your new sidebar
- Go back to page editor, you add the Widgetised Sidebar element
- In the Widgetised Sidebar Settings panel, you choose your sidebar from dropdown list of Sidebar option

Menu
BoxShop comes with a built-in mega menu that is perfect for displaying the large menu. You can add any widget to your menu. It also allows you to add Icon, Column and Background Image. This section will explain how to set up a new mega menu.
Follow the steps below to set up a Mega Menu:
- Go to Appearance > Menus to create or edit a menu that you already have
- Only first level of menu items can enable Mega Menu. Just check Enable Mega Menu option
- After enabling Mega Menu, it will show you the options of Mega Menu below
- Columns: You can choose 1, 2, 3, 4 columns or Fullwidth
- Display A Widget Area: Get content from Widget Area
- Static HTML: Allow you to directly add the custom html code into your menu
- Set Thumbnail: Add an image next to menu item. This option does not work on Mobile Menu. If you want to add an icon, you can add a FontAwesome class into the CSS Classes field
- Set Background: This option allows you to set a background image for Mega Menu
- Background Repeat and Background Position: Allow you to configure the background image

After setting up your menu, you will scroll down to the bottom and assign the menu to the Primary Navigation location. If you assign your menu to the Vertical Navigation location, it will become your vertical menu.
Mobile menu doesn't support Mega Menu. If you want to show another menu on Mobile, you will create a new menu and assign to the Mobile Navigation location.
In some cases, if you don't see the Product Categories tab or the CSS Classes field, you will click the Screen Options button on the top right corner. You find elements that you want to show and enable them.
This section explains how to create a mega menu look like our demo
We use the Navigation Menu widget to display the mega menu content. Each Navigation Menu is a column in the mega menu
- Create a menu. You will not assign to any menu location
- Go to Appearance > Widgets. You add a Navigation Menu widget to one of TS Mega Menu Widget Areas
- Select Menu from dropdown list
- Go to Appearance > Menus. You select a Mega Menu Widget Area that you have set up

You can use the Text widget and add custom html into the Static HTML field. Each Text widget is not a column. Below is the sample code
Pages
BoxShop comes with the WPBakery Page Builder plugin and powerful Page Options which help you build any kinds of pages. The following sections will explain how to create a new page and make it look like our demo. If you use our One Click Import Demo functionality, you can ignore this.
Create A New Page
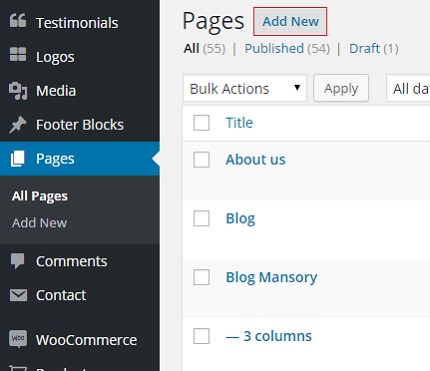
Follow the steps below to create a new page:
- In admin panel, go to Pages and click on the Add New button
- Input the page title and page content
- On the Page Attributes section, choose the page template from dropdown list
- Scroll down and find the Page Options section, make some configurations for your page
Page Options
In the page editor, you will see the Page Options section at the bottom of editor. It will help you create many kinds of pages.
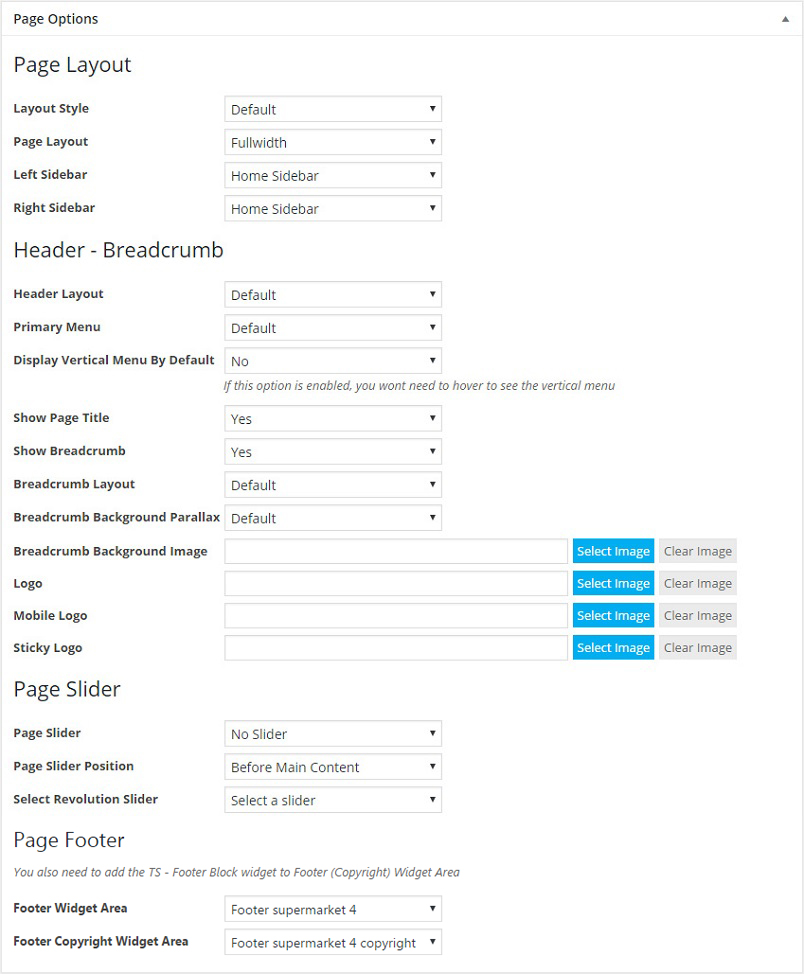
Some options will override the options in Theme Options. Select Default if you want to use your global settings.
- Layout Style: select Boxed or Wide layout
- Page Layout: select Fullwidth, Left Sidebar, Right Sidebar or Left & Right Sidebar
- Left Sidebar: select a sidebar to display on the left sidebar
- Right Sidebar: select a sidebar to display on the right sidebar
- Header Layout: select one of Header Layouts
- Top Header Transparent: make top header transparent. Only available on some header layouts
- Top Header Text Color: select Light if Top Header is transparent and background is dark
- Primary Menu: select a different menu for this page
- Display Vertical Menu By Default: show vertical menu without hovering
- Show Page Title: show or hide the page title. The page title is hidden on the home page
- Show Breadcrumb: show or hide the breadcrumb. It is also hidden on the home page
- Breadcrumb Layout: select a layout for your breadcrumb
- Breadcrumb Background Parallax: allow you to apply parallax in the breadcrumb background
- Breadcrumb Background Image: change the breadcrumb background image for this page
- Logo: allow you to display a different logo on this page
- Mobile Logo: show this logo on mobile
- Sticky Logo: show this logo on the sticky header
- Page Slider: allow you to add a slider on your page
- Page Slider Position: set Position for your slider (Before Header or Before Main Content)
- Select Revolution Slider: if you set Page Slider to Revolution Slider, you will select a slider to display
- Footer Widget Area: select a footer block to replace the footer block which is added to Footer Widget Area
- Footer Copyright Widget Area: select a footer block to replace the footer block which is added to Footer Copyright Widget Area
Home Pages
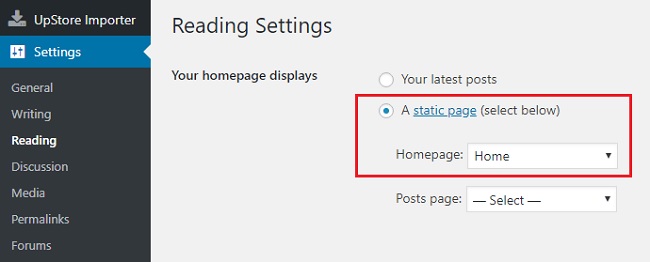
Setting up a home page
- In admin panel, you go to Settings > Reading.
- You choose the A static page(select below) option.
- Select a page from dropdown list of the Homepage option.
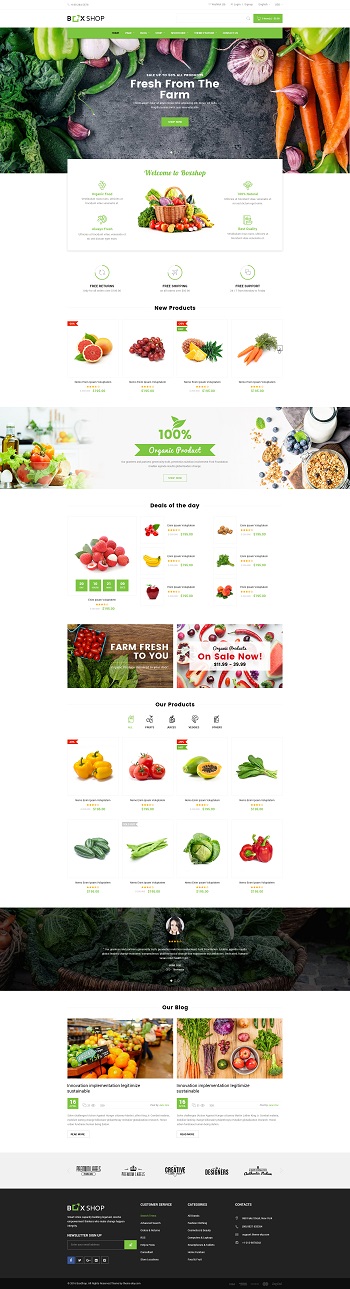
Default Store - Supermarket 1
Page Content:
Page Configurations:
- Page Template: Default Template
- Layout Style: Default (Wide)
- Page Layout: Fullwidth
- Header Layout: Default ( Header Layout 1 )
- Display Vertical Menu By Default: Yes
- Page Slider: No Slider
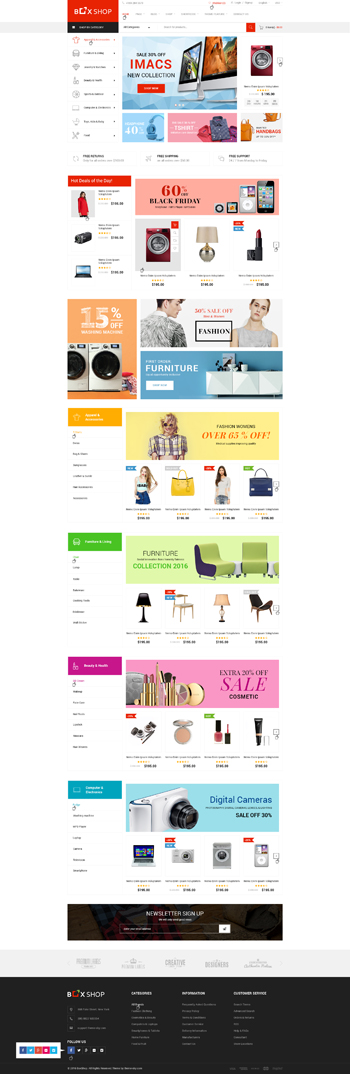
Supermarket 2
Page Content:
Page Configurations:
- Page Template: Default Template
- Layout Style: Default (Wide)
- Page Layout: Fullwidth
- Header Layout: Header Layout 2
- Page Slider: No Slider

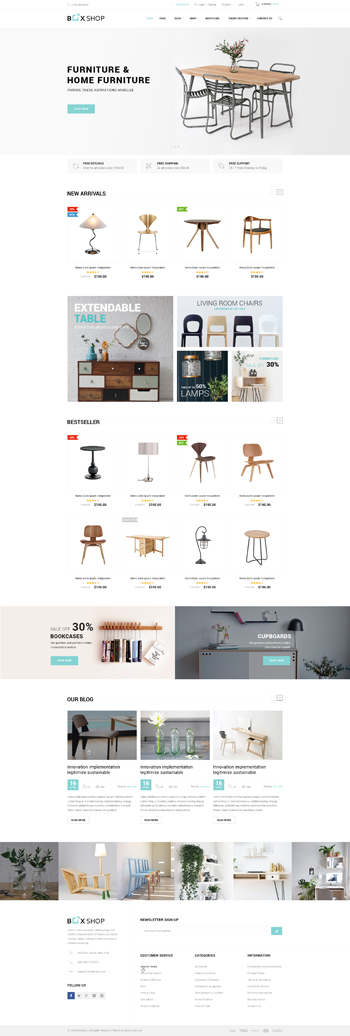
Furniture
Page Content:
Page Configurations:
- Page Template: Default Template
- Layout Style: Default (Wide)
- Page Layout: Fullwidth
- Header Layout: Header Layout 3
- Top Header Transparent: No
- Page Slider: Revolution Slider
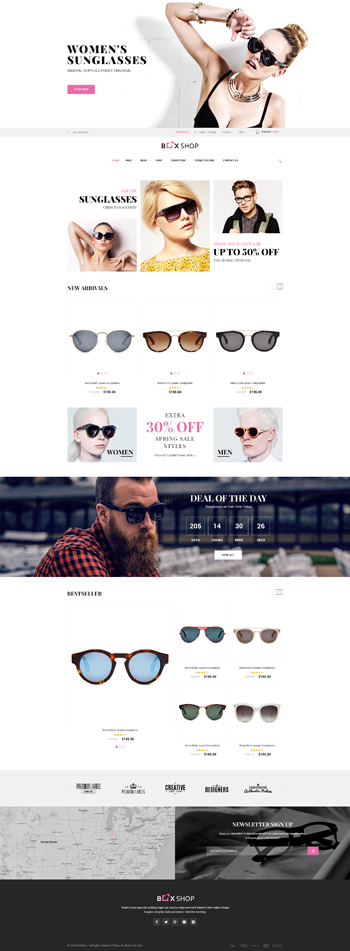
Glasses
Page Content:
Page Configurations:
- Page Template: Default Template
- Layout Style: Default (Wide)
- Page Layout: Fullwidth
- Header Layout: Header Layout 4
- Page Slider: Revolution Slider
- Page Slider Position: Before Header
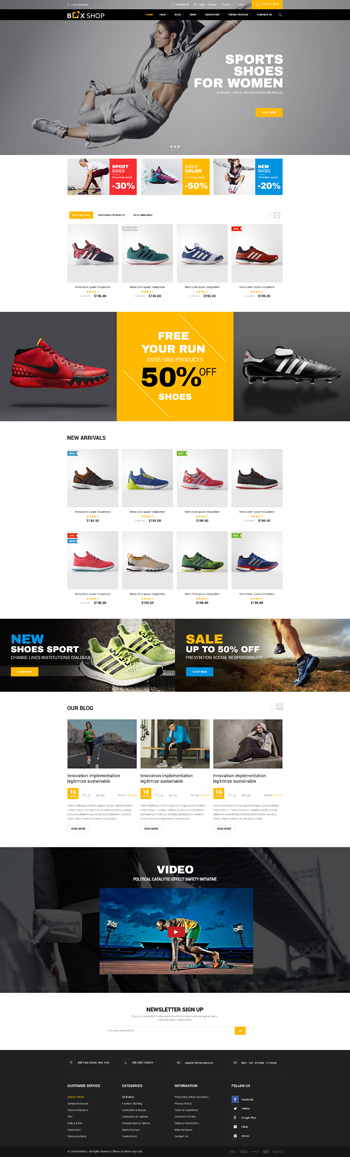
Shoes
Page Content:
Page Configurations:
- Page Template: Default Template
- Layout Style: Default (Wide)
- Page Layout: Fullwidth
- Header Layout: Header Layout 3
- Top Header Transparent: Yes
- Top Header Text Color: Light
- Page Slider: Revolution Slider
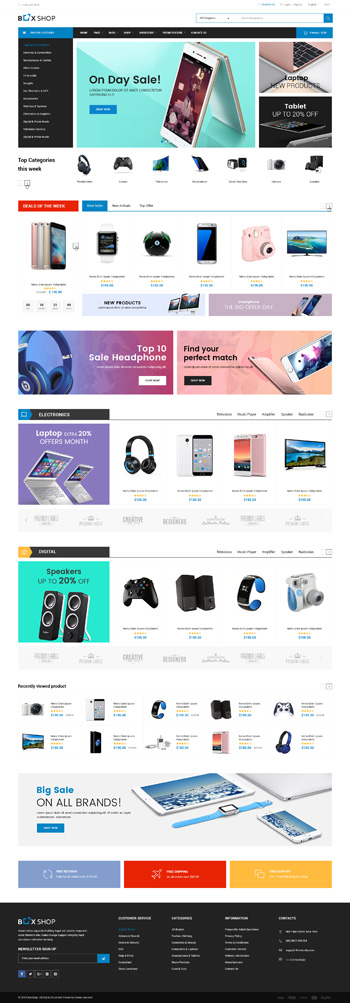
Electronic
Page Content:
Page Configurations:
- Page Template: Fullwidth Template
- Header Layout: Header Layout 5
- Display Vertical Menu By Default: Yes
- Page Slider: No Slider
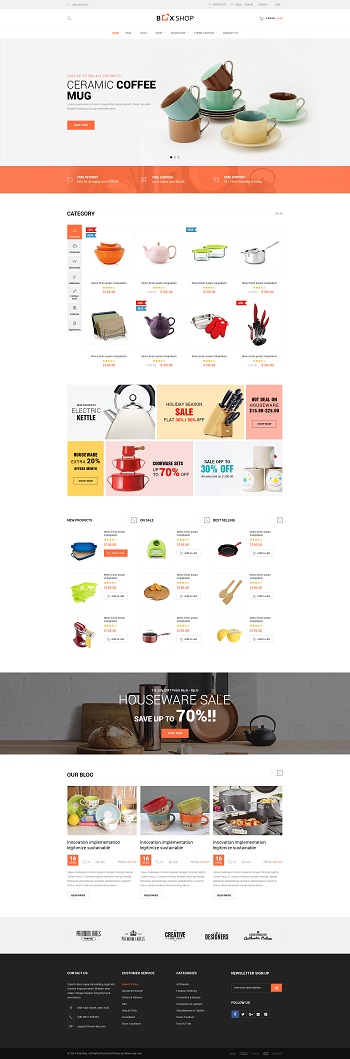
Houseware
Page Content:
Page Configurations:
- Page Template: Default Template
- Layout Style: Default (Wide)
- Header Layout: Header Layout 6
- Page Slider: Revolution Slider
Organic
Page Content:
Page Configurations:
- Page Template: Default Template
- Layout Style: Default (Wide)
- Header Layout: Header Layout 7
- Page Slider: No Slider
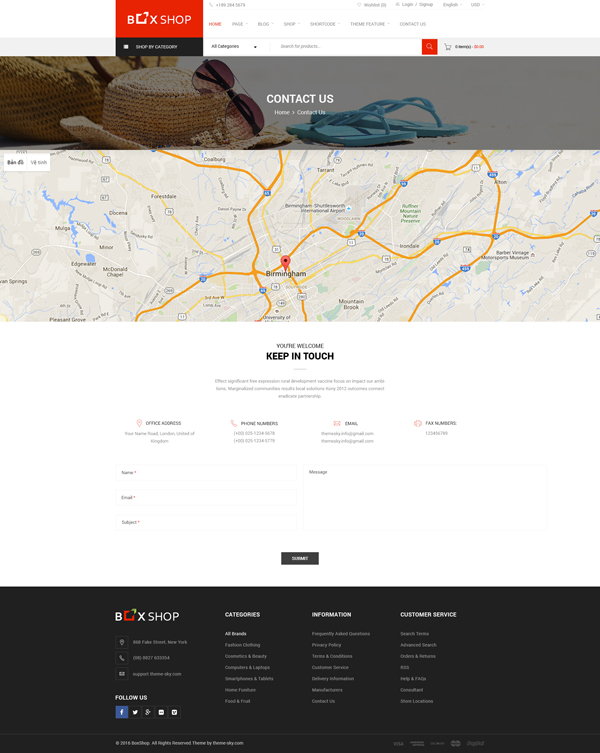
Contact Page
It is easy to make your contact page look like our demo. Simply copy the code below and paste into the page content (in the Text editor).
Blog
BoxShop supports 5 post formats: Standard, Audio, Gallery, Quote and Video. They will help you easily make a microblogging website.
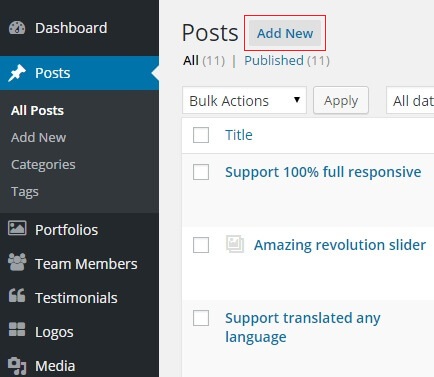
Create A New Post
Follow the steps below to create a new post:
- Go to Posts
- Click on the Add New button
- Input the post title and post content
- Choose the post format and category on the right hand side
- Scroll down and find the Post Options section, make some configurations for your post
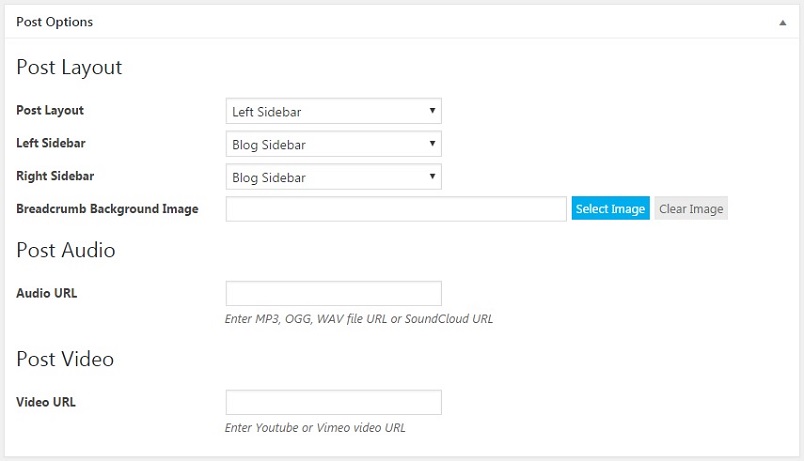
Post Options
In the post editor, you will see the Post Options section at the bottom of editor. It will help you create different layouts for different posts. Also, if you set the post format to Video or Audio, you will input your Video or Audio URL here.
Blog Page
Follow the steps below to set up a Blog page:
- You create a new page
- Input the page title. You don't need to input the content
- On the Page Attributes section, set Tempate to Blog Template
- Save your page
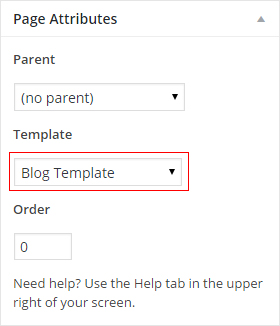
- If you use Blog Template, you will configure your blog layout in the Page Options section.
- If your Front page displays the latest posts (setup in Settings > Reading), you will configure your blog layout in Theme Options > Blog tab.
- You use TS Blogs shortcode to display your blogs in the masonry layout.
WPBakery Page Builder
WPBakery Page Builder will help you manage your content at the WordPress sites and build any layout you can imagine in a few minutes without coding. You can read WPBakery Page Builder Documentation to get more details.
Please note that you don't directly purchase the WPBakery Page Builder plugin. So you can not update it by yourself. It is also not recommended. When it has a new version, we will be careful to test and release the new theme's version. If you see the notification below, you can dismiss it.

How to add new element
To add a new element, you click the BACKEND EDITOR button on the top left of WYSIWYG (text editor)

WYSIWYG editor change to WPBakery Page Builder canvas. You can work with it as you do with regular WPBakery Page Builder. You click on the Add element button to add a new element.

Then, you choose an element from WPBakery Page Builder elements list
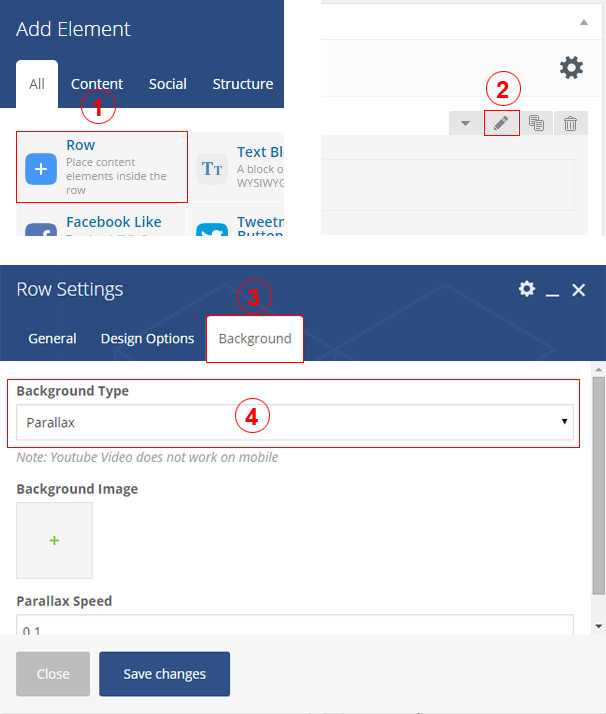
Adding Parallax/Video Background
Follow the steps below to add a parallax/video background
- Add a new Row
- Then, you click to edit that row
- In the Row Settings panel, you select the Background tab
- You set Background Type to Parallax, Youtube Video or Hosted Video
- Make some configuration below
Revolution Slider
BoxShop includes the popular Revolution Slider Created By ThemePunch. This slider is 100% responsive and has many amazing options. In the following sections, you will know how to add a new slider and how to show it in frontend. This is its own documentation. You can read to get more information.
Please note that you don't directly purchase the Revolution Slider plugin. So you can not update it by yourself. It is also not recommended. When it has a new version, we will be careful to test and release the new theme's version. If you see the notification below, you can dismiss it.

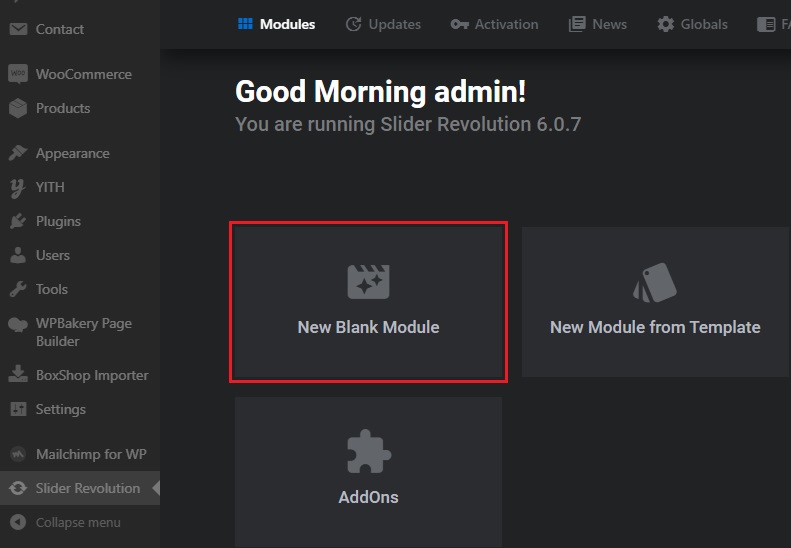
Create A New Revolution Slider
Follow the steps below to create a new Revolution Slider:
- You go to the Slider Revolution page
- Click on the New Blank Module box
- Input the slider title and alias
- Make some configurations
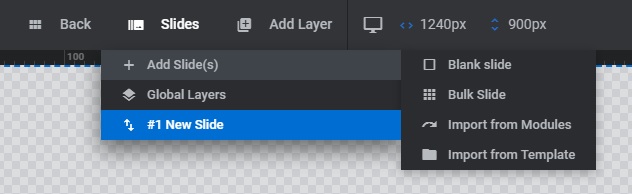
Follow the steps below to add a new slide to your sliders:
- Hover on Slides > Add Slide(s) on the top bar
- Choose one of the listed options below
- Blank Slide: add a new Slide without any predefined content
- Bulk Slide: add more than one Slide at a time with predefined background images
- Import from Modules: add a Slide from Modules
- Import from Template: add a Slide from the Template Library
Using Revolution Slider
There are three ways to use Revolution Slider
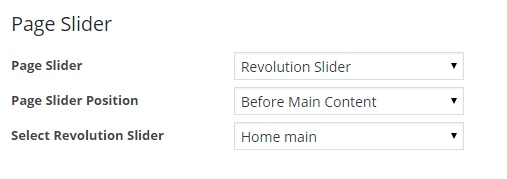
Assign a slider from the Page Options section
- Create or edit a page
- Find the Page Options section below
- Set the Page Slider option to Revolution Slider
- Finally, you choose a slider from the Select Revolution Slider option
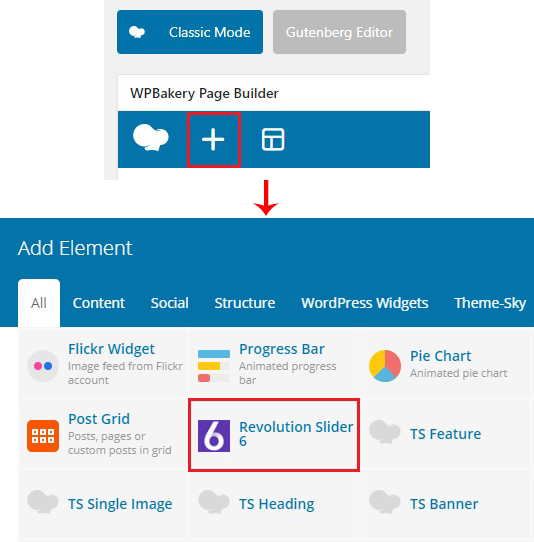
Add slider from WPBakery Page Builder content element list
- In the page editor, you click on the Backend Editor button on the top left of WYSIWYG(text editor)
- Then, you click on the Add New Element button
- You find the Revolution Slider element. Choose it
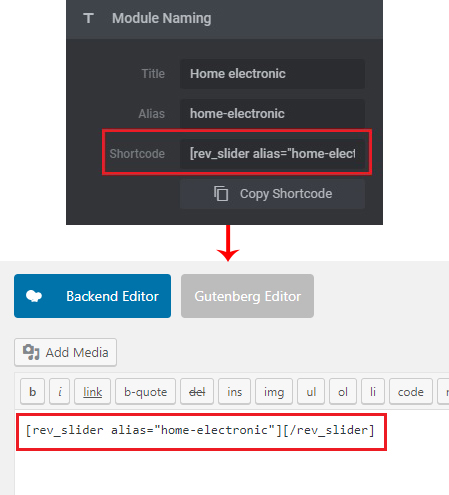
Use the slider shortcode
- You go to the Slider Revolution page
- Click to edit a slider and find the shortcode in the Module Naming box
- Copy the shortcode and paste into your page content
WooCommerce
BoxShop theme is fully compatible with the latest version of the WooCommerce plugin. We customized and added many features, shortcodes and widgets for this plugin. In the following sections, you will know how to install and set up the WooCommerce plugin. You can also refer WooCommerce Documentation to get more information.
Install WooCommerce
There are 2 ways to install WooCommerce
- After activating our theme, you go to Appearance > Install Plugins. You install WooCommerce from the required plugins list.
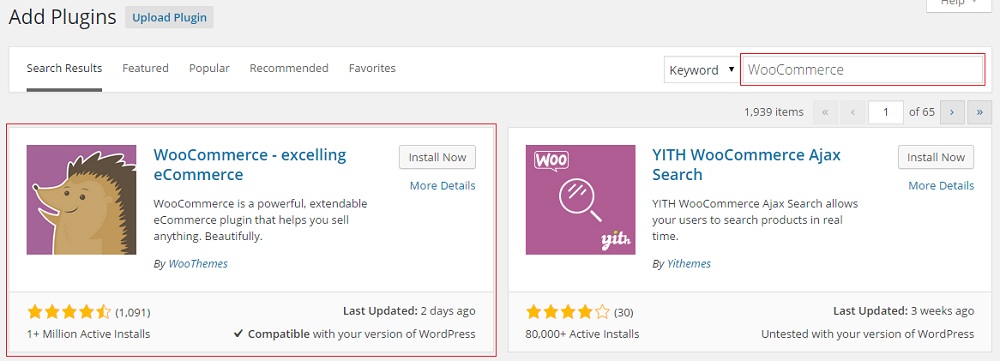
- Install WooCommerce from the Plugins page
Adding WooCommerce Pages
There are 2 ways to add WooCommerce pages
- After activating the WooCommerce plugin, you will get a notification as the screenshot below. Simply click the Install WooCommerce Pages button to create all WooCommerce pages
- Use the WooCommerce shortcodes. You can get them here

Setting Up WooCommerce
To set up WooCommerce, you go to WooCommerce > Settings in admin panel.
Currency Options
- In WooCommerce Settings page, you select the General tab
- You find the Currency Options section and configure your currency
List of currencies that you can choose

Product Image Sizes
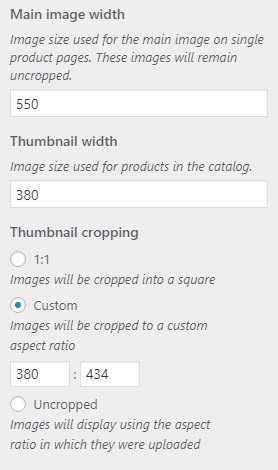
- You go to Appearance > Customize > WooCommerce > Product Images. You configure your product image size in there
- Our default demo is configured as the screenshot
Page Settings
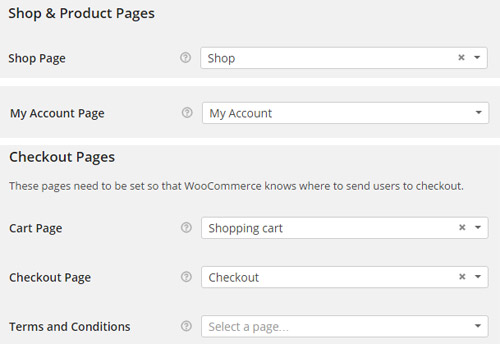
After you create WooCommerce pages. You will go to the Settings page to assign them.
- To assign the Shop page, you select the Products tab
- To assign the My Account, Cart and Checkout pages, you select the Advanced tab
Registration Options
You also make sure that you allow your customers to register on your site. You select the Accounts & Privacy tab and find the Account creation option as the screenshot.

Adding Product
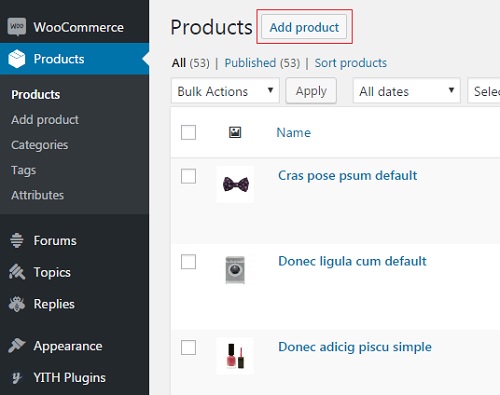
Follow the steps below to add a new product
- In admin panel, you go to Products and click the Add Product button
- Input the product title and product content
- Select Product Category, Product Tag
- Add Featured Image and Product Gallery
- In the Product Options section, you can override some options in Theme Options
- Next is the Product Data section. This is where the majority of the product data is configured
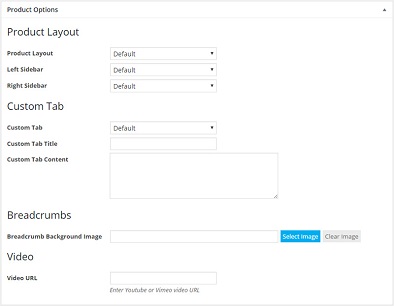
Product Options
This section allows you to override some options in Theme Options. You can set layout for individual products. You can also override custom tab content
Product Data
You should also read WooCommerce Documentation to get more details. We only have some notes that we think you need to know.
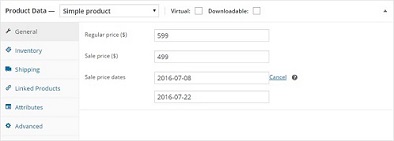
- Adding a product on sale and a deal:
- With the Simple Product, you select General tab. You add a Sale Price and click the Schedule button to set up date.
- With the Variable Product, after setting up Product Attributes in the Attributes tab, you go to the Variations tab and add New Variation. With each Variation, you also click the Schedule button next to the Sale Price field. Please note that product only displays the time of the first Variation.
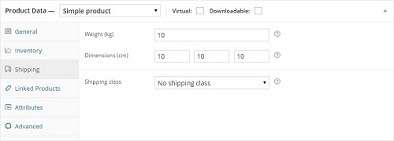
- Adding Additional Information: You go to the Shipping tab. You set value of Weight and Dimensions options. You can change the unit by going to WooCommerce > Settings > Products tab
- Enable/Disable Product Review: You go to the Advanced tab. You will see Enable reviews option. Just check/uncheck it. If you want to disable the Reviews tab, you can read this article.
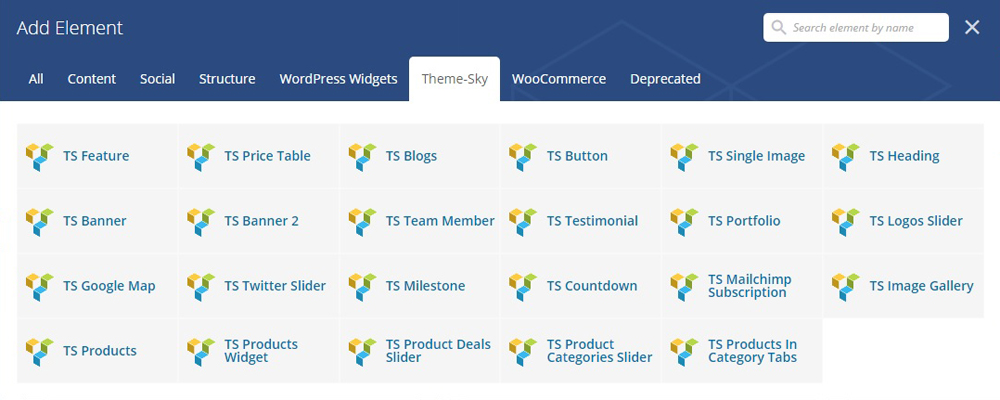
Shortcodes
BoxShop comes with several shortcodes which can be used to display your content. To use our shortcodes, you go to page editor and change to WPBakery Page Builder canvas. Click on the Add Element button to open WPBakery Page Builder elements list and select the Theme-Sky tab.
- TS Feature: display your feature with icon, image
- TS Price Table: display a price table
- TS Blogs: display your blogs in a grid, slider or masonry layout
- TS Button: display a button
- TS Single Image: it is similar with banner, but only display a single image
- TS Heading: display a heading
- TS Banner: display your banner. Allow you to add content on your banner
- TS Banner 2: it is similar with TS Banner, but it allows you to add another image on your main banner
- TS Team Member: display your team member. Go to Team Members to add new member.
- TS Testimonial: display testimonials in a slider. Go to Testimonials to add new testimonial
- TS Portfolio: display your portfolios in a slider or masonry layout
- TS Logos Slider: display your partner logos in a slider. Go to Logos to add new logo
- TS Google Map: just input your address to show your map. Please note that you have to input your API key in Appearance > Theme Options > General tab. Get the API key here
- TS Milestone: display your achievements
- TS Countdown: display a countdown timer
- TS Mailchimp Subscription: display a Mailchimp Subscription form. You need to install the MailChimp For WordPress plugin and add a form before using this shortcode. You get the form html at the bottom of this section. To know how to create an API Key, you can read this article. To know how to create an Audience, you can read this article.
- TS Products: display your products in a grid or slider layout
- TS Products Widget: display your products as the product widget
- TS Product Deals Slider: display products on sale with a countdown timer
- TS Product Categories Slider: display product categories in a slider
- TS Products In Category Tabs: display products in tabs. Each tab contains products of a category
Below is html of Mailchimp form which is used for our demo
Translations
BoxShop is ready to translate by using the po file. If you want to build a multilingual site, you need to use WPML plugin. Our theme does not include the WPML plugin. It is only compatible with the WPML plugin. You have to buy a license for this plugin.
Using Po File
There are 2 ways to create and edit the po file
- Use the Poedit software and refer this document
- Use a translation plugin, such as Loco Translate plugin
- You have to generate the mo file after translating
- You have to set your language in Settings > General. It is the Site Language option
Using WPML
In this section, you will know how to build a multilingual website by using the WPML plugin. All the information needs to get started and use it is on the WPML.org page.
Below are some reference links:
Installing and Setting Up the WPML plugin
You need to install a recent version of WPML, including the String Translation, Translation Management and CMS Navigation modules. After installing these plugins, you set up Languages from WPML > Languages and translate your content.
Showing language switcher dropdown style on header
You go to WPML > Languages. You enable the Custom language switchers option. Then, you click the Customize button. A popup will appear. You change the Language switcher style option to Dropdown or Dropdown click.

Translating Pages and Posts
Go to All Pages and pick a page for translation. Click on the plus icon. If the page is already translated, the plus icon will be replaced with a pen icon.
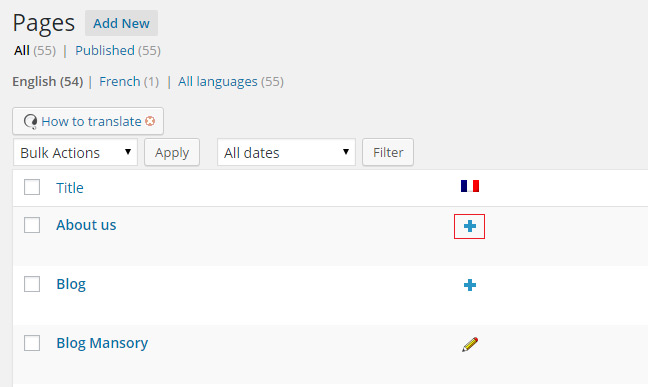
WPML actually creates a new WordPress page, linked to the original one. In this new page, you can add new content as you normally do. You can also keep the original content, just translate into the new language.
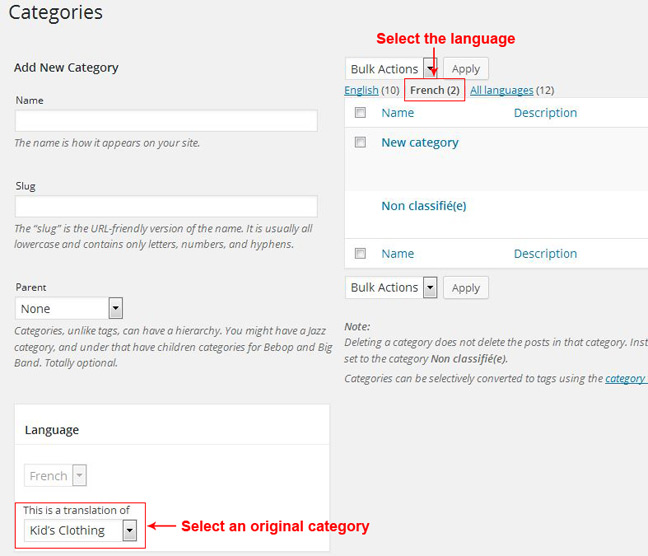
Translating Categories
To translate a category, click on the language which you want to translate it and then add a new category. Make sure the new category is linked to an original category.
Translating Menus
You go to Appearance > Menus. Just add a new menu. You select the language and the original menu which links to the new menu.

WPML can synchronize menus for you. This means that WPML can generate and keep in sync menus for other languages pointing to the translated versions of the pages, posts or categories.
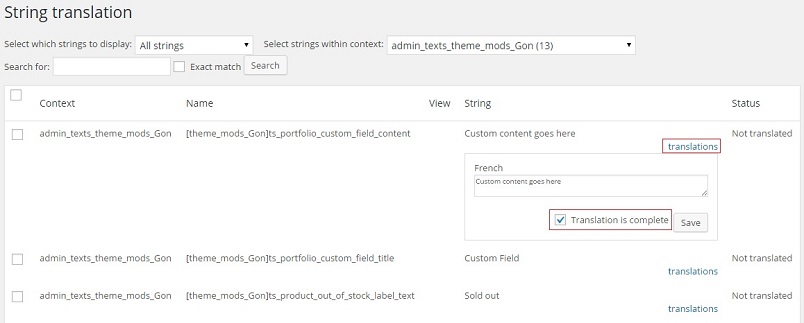
Translating the theme and other texts
You go to WPML > String Translation. Find the text in the list and translate it. Please make sure you check the Translation is complete checkbox after translating.
Sometimes, some texts can not be found. You need to go to WPML > Theme and Plugins localization. You click on the Scan the theme for strings button. Then, you go back to the String Translation page and find those texts again.